Remote laboratory sharing
Table of Contents
Introduction
WebLab-Deusto supports federation. This means that one WebLab-Deusto instance can share its laboratories with other instances, as well as consume them.
Let’s imagine that there are two universities, UniA and UniB. If
UniB is a provider, it will have registered one special type of user (e.g.,
uni-b, with role federated (instead of student or
administrator). UniB will guarantee permissions to this user as if it
was any other type of user. It can even be part of a group. For example, it may
grant access to this user to an experiment called exp1.
Then, UniA can configure that it will use UniB with that user (and
password) only to access exp1. It may also define that exp1 at UniB
is called experiment1 in UniA, so the name does not really matter.
Furthermore, UniA can re-share exp1 to a third University, called
UniC, using the same approach (creating a new user, etc.).
During the entire process, UniB will not need to know who are those students
coming from UniA, since UniB trusts UniA and UniA trusts those
students. Also, the consumer system, once the user has finished, will be able to
know what the user did, so if the administrator goes to the stored Logs in the
administration panel, he will see what commands were sent.
In this case, UniA is acting as a consumer, and UniB as a provider. It
is also common that both act as consumers and providers at the same time,
sharing different laboratories each other. If it happens that both have copies
of the same laboratory (e.g., the VISIR remote
laboratory is available in at least 6 universities in Europe), they can even
define that they will use the other system whenever their local resources are
full. If UniA has 3 copies and UniB has 2 copies, and 6 students come in
any of them, the sixth student will be waiting for any of the 5 students to
finish their session.
Since all the relations are defined as users, the administrators can also change
the priority in the queue. For instance, this enables that UniB defines
that, in case of queue, their students will go first (and those from UniA
later).
This section explains the technical details of how to do this. We will assume
that the experiment in UniB is called visir@Visir experiments, and in
UniA we want to call it ud-electronics@Electronics experiments.
Warning
If you want to use this (or any of the WebLab-Deusto laboratories),
contact us, and we will create you an account for your
university. Please do not use the weblabfed user for anything but
testing.
Consuming other remote laboratories
So as to consume a remote laboratory, the first step is that the external system
creates a federated user. So as to test this, we will use the WebLab-Deusto
system in production with the following
public credentials: weblabfed and password. If you go there with your
web browser, you will see the laboratories available for that account, and you
can even use them as a regular user.
Then, the process is quite similar to deploying a new laboratory, but without interacting with the Laboratory server or the Experiment server, since they are already configured in the provider system.
Basically, we have to:
- Registering a scheduling system for the experiment
- Add the experiment server to the database and grant permissions
Note
As in all the steps that require changing the configuration of the server, you will need to restart the WebLab-Deusto instance after applying all the changes.
Registering a scheduling system for the experiment
We have to configure the Core server to manage this remote laboratory. As
explained in Step 3: Registering a scheduling system for the experiment, the
entire configuration of the Core server related to scheduling is by default in
the core_host_config.py file. It is placed there so if you have 4
Core servers in different instances (which is highly recommended), you have the configuration in a single location. In this file,
you will find information about the database, the scheduling backend, etc.
There is one variable called core_scheduling_systems, which by default is as
follows:
core_scheduling_systems = {
        'dummy_queue'      : ('PRIORITY_QUEUE', {}),
        'robot_external'   : weblabdeusto_federation_demo,
}
There, we have to add a new scheduler called external_electronics. We can do it directly:
core_scheduling_systems = {
        'dummy_queue'      : ('PRIORITY_QUEUE', {}),
        'robot_external'   : weblabdeusto_federation_demo,
        'external_electronics' : ('EXTERNAL_WEBLAB_DEUSTO', {
                                'baseurl' : 'https://weblab.deusto.es/weblab/',
                                'username' : 'weblabfed',
                                'password' : 'password',
                                'experiments_map' : {'ud-electronics@Electronics experiments' : 'visir@Visir experiments'}
                        })
}
Or, more commonly, create other variable for that:
electronics_federation = ('EXTERNAL_WEBLAB_DEUSTO', {
                                'baseurl' : 'https://weblab.deusto.es/weblab/',
                                'username' : 'weblabfed',
                                'password' : 'password',
                                'experiments_map' : {'ud-electronics@Electronics experiments' : 'visir@Visir experiments'}
                        })


core_scheduling_systems = {
        'dummy_queue'      : ('PRIORITY_QUEUE', {}),
        'robot_external'   : weblabdeusto_federation_demo,
        'external_electronics' : electronics_federation,
}
There, what we are detailing is that the scheduler identified by external_electronics
will rely on the external server with the URL and credentials defined in the
other variable. Note that there is a variable called experiments_map, which
maps local names with names in the foreign system. In this case, we are
definining that when using this scheduler for the local
ud-electronics@Electronics experiments, it will instead call the
foreign system asking for visir@Visir experiments. If this variable is not
provided or is empty ({}), it will simply ask for the same name as local (in
this case, it would call ud-electronics@Electronics experiment, which
would not exist in the foreign system).
Now we have to register that we actually want to use this scheduler. For local experiments, there is a local variable explained in Step 3: Registering a scheduling system for the experiment, which defines which Laboratory servers manage which Experiment servers:
core_coordinator_laboratory_servers = {
    'laboratory1:laboratory1@core_machine' : {
            'exp1|dummy|Dummy experiments' : 'dummy1@dummy_queue',
        },
}
However, in the federated environment, there is no such concept, since this mapping is already managed by the remote system. What we need is to use other variable as follows:
core_coordinator_external_servers = {
    'external-robot-movement@Robot experiments'     : [ 'robot_external' ],
    'ud-electronics@Electronics experiments'   : [ 'external_electronics' ],
}
This is basically defining that the ud-electronics@Electronics
experiments will be managed by the scheduler external_electronics that we just
defined.
Note
This configuration maps an identifier to a list of schedulers. This means that you can add multiple scheduler if the particular laboratory was deployed in more than one system. For instance, it could define:
core_coordinator_external_servers = {
    'external-robot-movement@Robot experiments'     : [ 'robot_external' ],
    'ud-electronics@Electronics experiments'   : [ 'electronics-deusto', 'electronics-uned' ],
}
And your system will use both universities (as long as you have the credentials for both configured in the schedulers variable).
Furthermore, this configuration is not incompatible with local laboratories.
If you had the core_coordinator_laboratory_servers configured using the
same identifier pointing to a local scheduler, the system will use first the
local resources, and if they are in a queue it will use the remote
resources. This is how you can implemented distributed load balancing.
Add the experiment server to the database and grant permissions
The last step is to add the laboratory to the database and grant permissions to the students. This process is exactly the same as defined in Step 4: Add the experiment server to the database and grant permissions.
Go to the administrator panel by clicking on the top right corner the following icon:

You will see this:
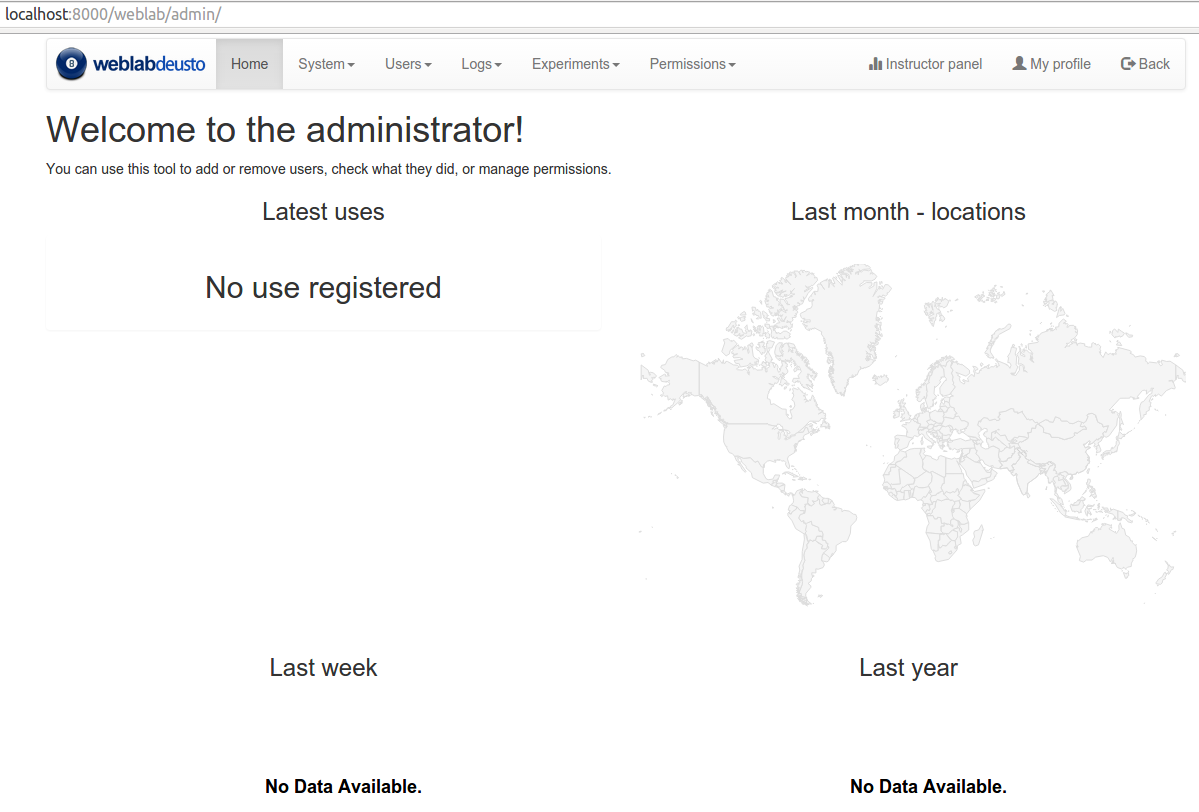
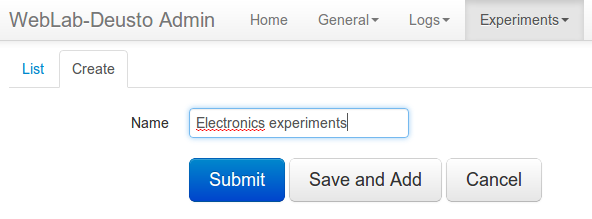
On it, go to Experiments, then on Categories, and then on Create.
You will be able to add a new category (if it did not exist), such as
Electronics experiments, and click on Submit:
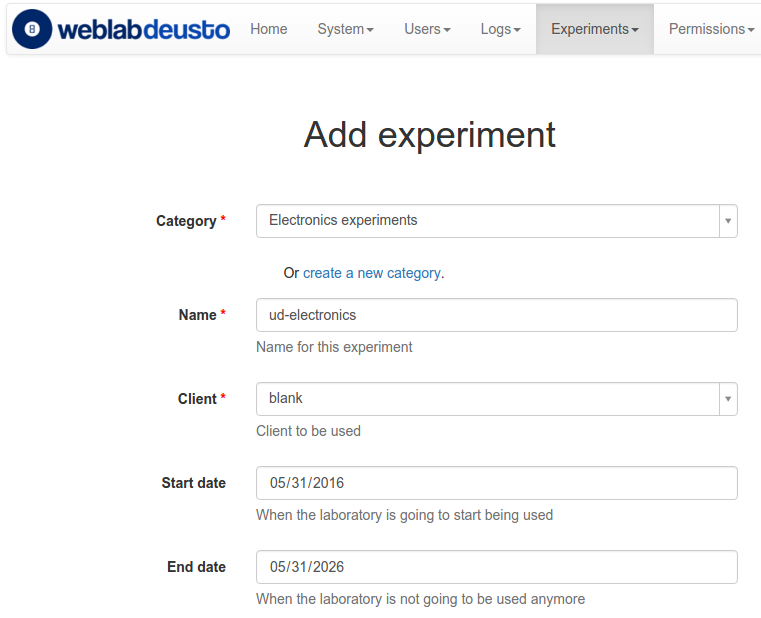
Then, go back to Experiments, then Experiments, and then on Create.
You will be able to add a new experiment, such as ud-electronics, using the
category just created. The Start and End dates refer to the usage data. At this
moment, no more action is taken on these data, but you should define since when
the experiment is available and until when. You can provide your own client if
you want to provide further instructions in the beginning, but typically here
you will want to leave the blank client:
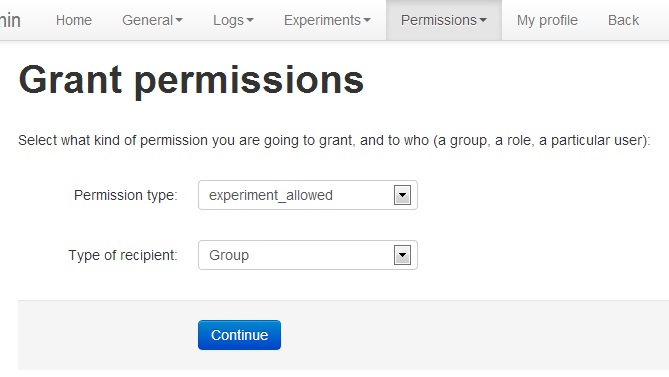
At this moment, the laboratory has been added to the database. Now you can
guarantee the permissions on users. So as to do this, click on Permissions,
Create. Select that you want to grant permission to a Group, of permission
type experiment_allowed.
And then you will be able to grant permissions on the developed laboratory to a particular group (such as Administrators):
From this point, you will be able to use this experiment from the main user interface.
Sharing your remote laboratories
Sharing a WebLab-Deusto laboratory is much easier than consuming one. You only need two steps:
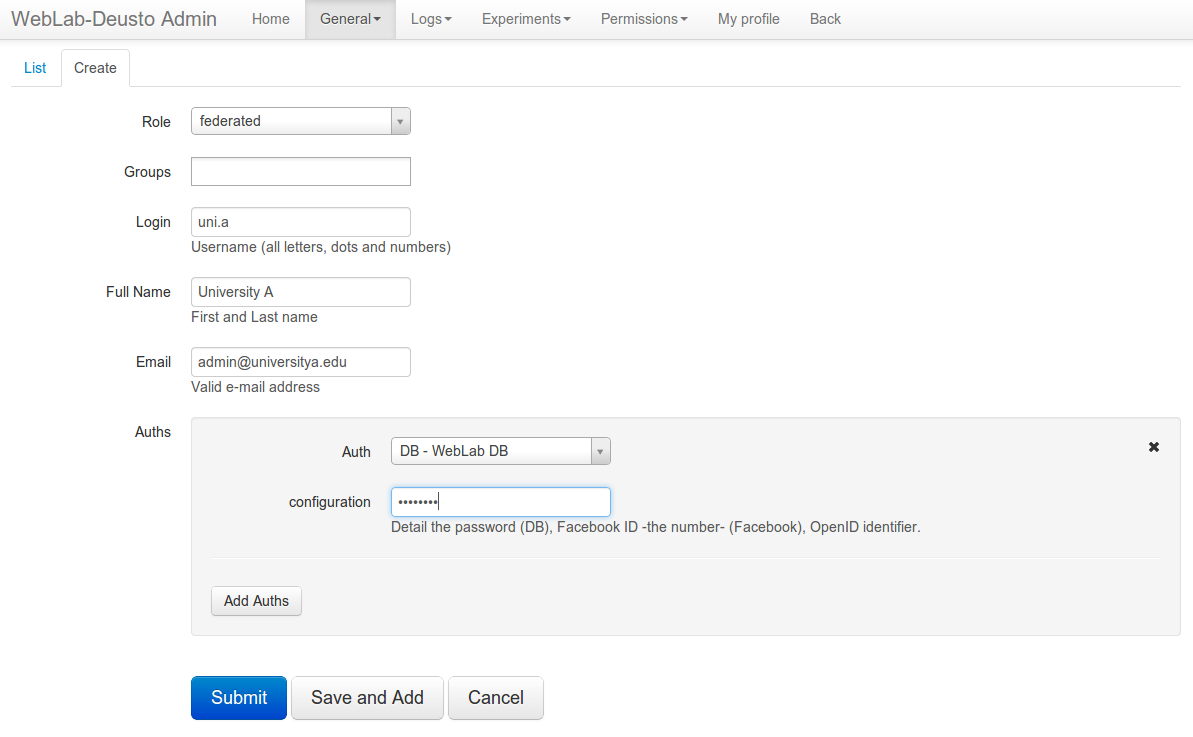
Create a user for the foreign entity
Go to the administrator panel by clicking on the top right corner the following icon:
You will see this:
There, go to General -> Users -> Create, and add a user using the
Role federated, and providing a password (click on “Add Auths” and select
DB):
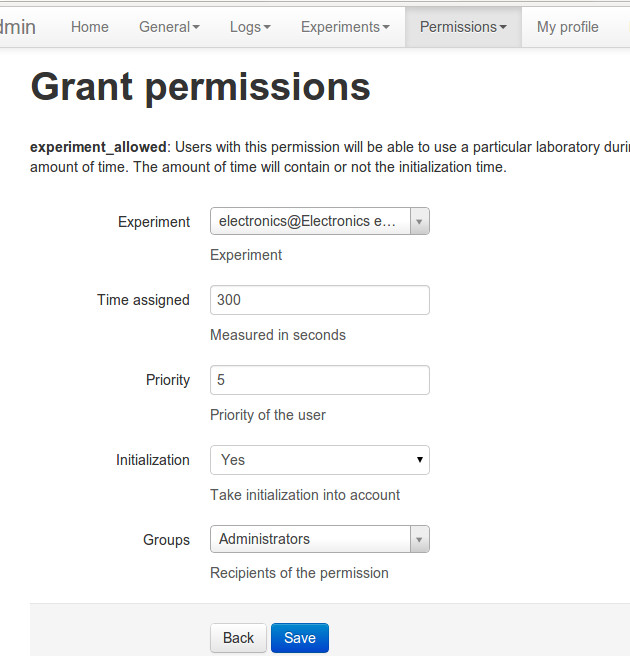
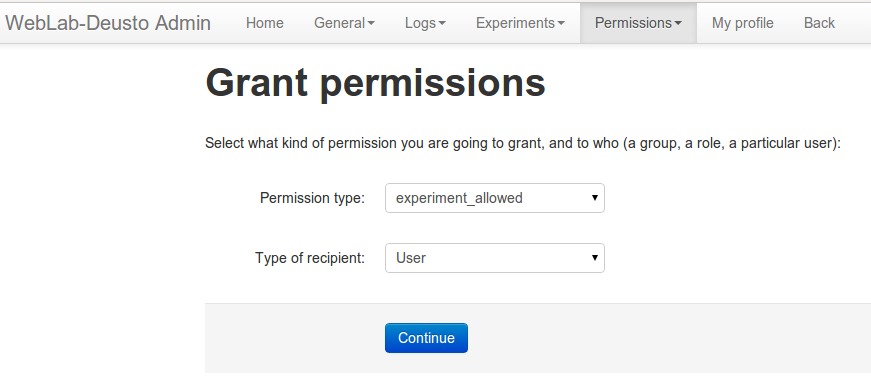
Grant permissions on that laboratory to this entity
Still in the administration panel, click on Permissions,
Create. Select that you want to grant permission to a User instead of a
group, of permission type experiment_allowed.
Then, select the laboratory you wish to grant access to, select the user, and select the rest of the arguments.
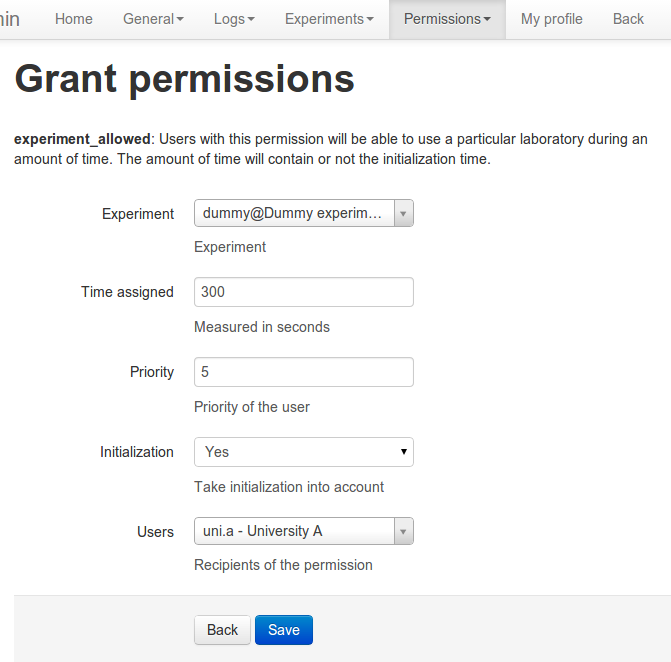
You may for instance establish that you allow 3600 seconds (1 hour) to the laboratory, but then the consumer side system may establish that one particular group will only have permission to use it for 10 minutes. However, the opposite is not possible, since even if the consumer system establishes that they can use it for one hour, when the consumer system contacts the provider system, it will define that they only have permissions for 10 minutes.
Exchanging or selling accesses to your labs on LabsLand
LabsLand enables you to exchange lab accesses with other institutions, for free or for profit. LabsLand is the spin-off of the WebLab-Deusto project, and it aims to support people to consume remote lab accesses in a daily basis. To this end, it provides a marketplace for both providers and consumers of remote laboratories, where remote laboratory providers can sell or share accesses to their remote laboratories, and consumers will have a clear idea of what they can really consume, and at what cost.
If you develop a remote laboratory with WebLab-Deusto, we encourage you to access LabsLand and joining the network.